
Painting a Room Without the Mess, Drips, or Do-Overs

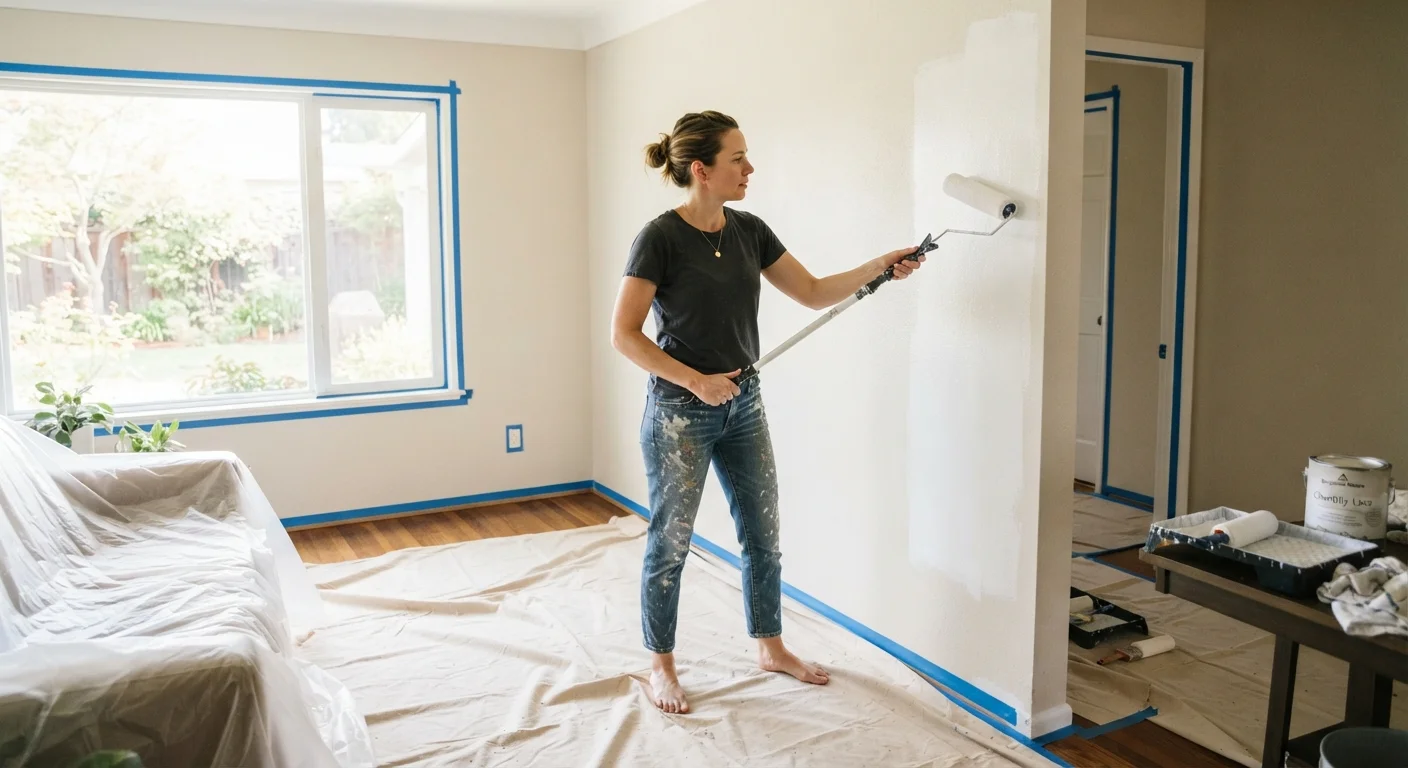
Photo: InsightsChief.com | Your Source Of Trusted Insights editorial
Key Takeaways
- Surface preparation - cleaning, patching, and priming - determines whether paint adheres and lasts.
- Cutting in edges with a brush before rolling the walls prevents lap marks and uneven coverage.
- Two thin coats consistently outperform one thick coat for a smooth, durable finish.
- Painter's tape applied to dry surfaces and removed while paint is slightly tacky reduces bleed and peeling.
- Skipping prep is the single most common reason beginner paint jobs require do-overs.
Why Most Paint Jobs Go Wrong Before the Roller Ever Touches the Wall
A fresh coat of paint is one of the most affordable ways to transform a room - but it only looks professional when the groundwork is done correctly. The majority of disappointing results - drips, streaks, peeling edges, and uneven sheen - trace back to steps skipped before the first drop of paint is opened. This is just as true for wall painting as it is for more specialized surfaces; the principles in our guide on why painted cabinets chip and how to prep them apply broadly to any painted surface in your home.
Understanding what can go wrong - and why - helps you build habits that make every project faster and cleaner. If you're newer to home ownership and building up your maintenance skill set, the practical introduction to home maintenance for new homeowners is a useful companion to this guide.
What you will need
What You'll Need
Gather your supplies before starting. Running out mid-job forces rushed decisions that often show in the finished wall.
9-inch paint roller with 3/8-inch nap sleeve
Applies paint efficiently to large flat wall surfaces with minimal texture.
2.5-inch angled sash brush
Cuts in paint along edges, corners, trim, and ceiling lines where a roller can't reach.
Painter's tape (2-inch)
Masks trim, outlet covers, and the ceiling line to create clean, sharp edges.
Drop cloths (canvas or plastic)
Protects floors and furniture from drips and spills during painting.
Spackle and putty knife
Fills nail holes, small cracks, and surface dents before priming.
120-grit sanding sponge
Smooths dried spackle patches and scuffs glossy surfaces so paint adheres better.
Primer (PVA or latex wall primer)
Seals porous surfaces and repairs so the topcoat applies evenly and bonds durably.
Extension pole for roller
Allows rolling upper wall sections and near the ceiling without a ladder for most standard ceiling heights.
Step-by-Step: From Bare Walls to a Clean Finish
Follow these steps in order. Skipping ahead - especially through the prep stages - is the most reliable way to end up with a result you'll want to repaint within a year. Painting is also a natural first step before larger projects; if a full room refresh is part of a bigger renovation, see our pre-renovation checklist before any structural work begins.
Clear and protect the room
Move furniture to the center of the room and cover it with drop cloths. Lay canvas or plastic drop cloths along all baseboards and across the floor. Remove outlet covers, switch plates, and any wall fixtures, and store the hardware in a labeled bag. Turn off power to outlets in the room at the breaker as an added precaution while covers are off.
Inspect and repair wall surfaces
Walk the entire room with bright lighting and mark any nail holes, cracks, or dings with a pencil. Fill each imperfection with lightweight spackle using a putty knife, slightly overfilling so you can sand flush once dry. Allow to dry fully - typically 2-4 hours depending on depth and humidity - before sanding smooth with a 120-grit sanding sponge. Wipe away dust with a damp cloth and let the surface dry.
Clean the walls
Wash walls with a mild solution of dish soap and warm water using a sponge, paying attention to areas near light switches, doorknobs, and chair-rail height where grease and hand oils accumulate. Rinse with clean water and allow to dry completely. Paint applied over dirt or grease will not adhere properly and may peel within months.
Apply primer
Prime the entire wall surface - not just patched areas - if you are making a significant color change, painting over a dark color, or working with new drywall. At minimum, spot-prime every spackle repair with a small brush. Allow primer to dry fully per the manufacturer's label before painting. Skipping this step is a leading cause of uneven sheen and poor coverage in the finished coat.
Apply painter's tape
Run painter's tape along the ceiling line, baseboard tops, window and door trim, and any other surface you want to protect. Press the tape edge firmly with a putty knife or your fingernail to prevent paint bleed. Apply tape only to fully dry, clean surfaces - tape on damp or dusty surfaces lifts and allows bleed-through.
Cut in the edges with a brush
Using your angled sash brush, paint a 2-3 inch band along all edges: ceiling line, corners, baseboard tops, and around trim. Work in sections of roughly 4 feet at a time so the cut-in edge doesn't dry before you roll adjacent wall areas - wet edges blend; dry edges leave visible lines. Hold the brush like a pencil near the ferrule for more control along precision lines.
Roll the walls in sections
Working in 3-foot-wide vertical sections, apply paint in a "W" or "M" pattern and then fill in with horizontal strokes without lifting the roller. Maintain a wet edge by slightly overlapping each section before the previous one dries. Apply two coats, allowing each to dry to the touch (typically 1-2 hours for latex paint) before the next. Two thin coats produce better adhesion and color uniformity than one heavy coat.
Remove tape and touch up
Remove painter's tape while the final coat is still slightly tacky - not fully wet and not fully dry. Pull at a 45-degree angle away from the painted surface. Once tape is off, inspect edges and touch up any bleeds or gaps with a small brush. Allow the paint to cure fully (48-72 hours for most latex paints) before cleaning walls or hanging anything on them.
Let Dry Times Work for You
Common Mistakes and How to Avoid Them
Even experienced painters run into avoidable problems. Here are the ones that show up most often in beginner projects:
- Skipping the primer on patched areas. Spackle and joint compound are highly porous. Bare compound absorbs topcoat paint unevenly, leaving dull spots called flashing. Always spot-prime repairs before painting the wall.
- Overloading the roller. A saturated roller causes drips and heavy texture. Roll the sleeve through the tray reservoir, then distribute the paint on the ridged slope until the roller applies evenly without dripping.
- Removing tape too late. If painter's tape is left until the paint is fully cured (24-48 hours), it can pull off dried paint with it. Remove tape while the final coat is still slightly tacky - typically 1-2 hours after application.
- Painting in poor light. Overhead lighting hides lap marks and missed spots. Use a handheld work light held at a low angle to the wall to spot thin coverage before it dries.
Ventilation Is Not Optional
Routine painting is also one of the maintenance tasks most commonly deferred - sometimes for years - which can allow minor wall damage to worsen. For a broader look at what else is worth keeping current, see home maintenance tasks homeowners frequently put off.
The content provided on our blog site traverses numerous categories, offering readers valuable and practical information. Readers can use the editorial team’s research and data to gain more insights into their topics of interest. However, they are requested not to treat the articles as conclusive. The website team cannot be held responsible for differences in data or inaccuracies found across other platforms. Please also note that the site might also miss out on various schemes and offers available that the readers may find more beneficial than the ones we cover.