
Your Weekend Kitchen Refresh: Low-Cost Updates That Change the Feel of the Space

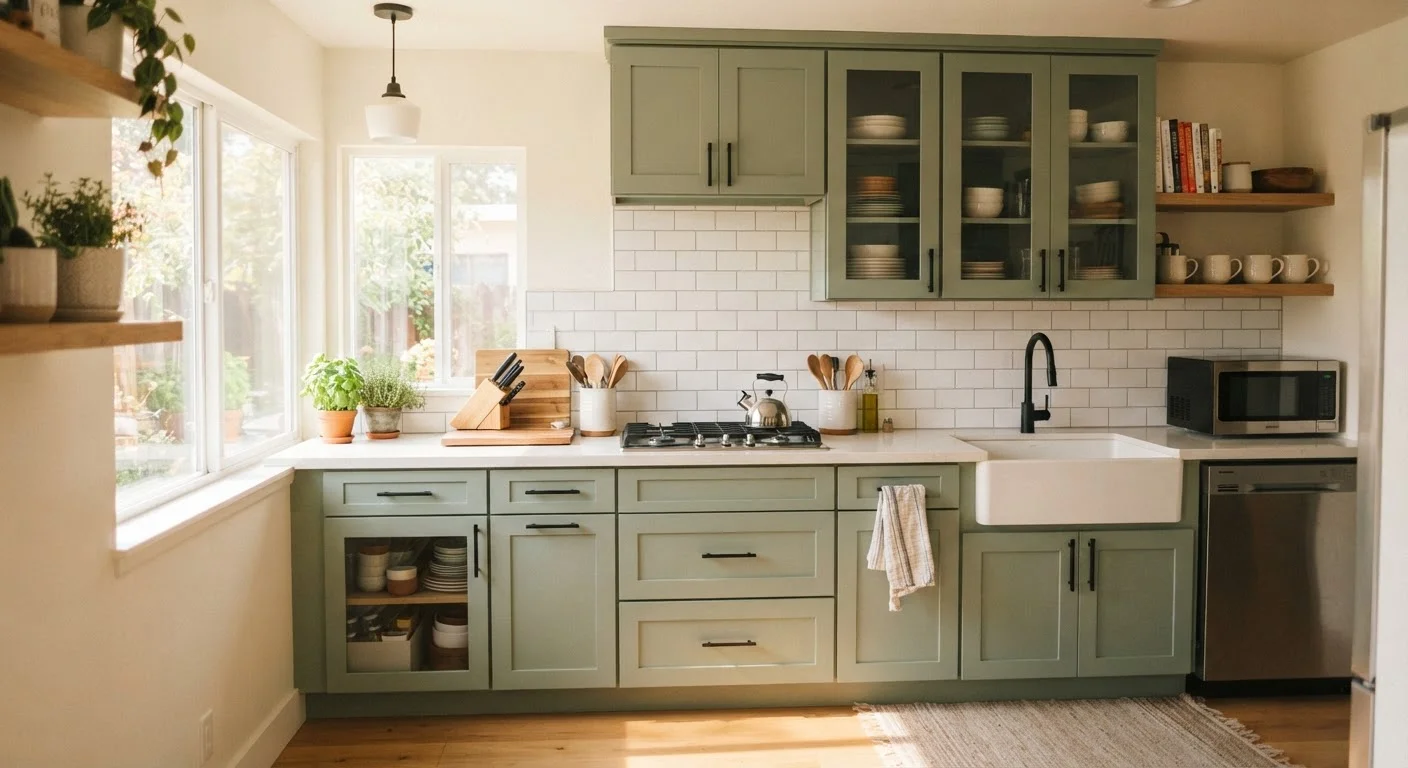
Photo: InsightsChief.com | Your Source Of Trusted Insights editorial
Key Takeaways
- Most kitchen refresh projects can be completed in a single weekend with basic tools and modest materials.
- Swapping cabinet hardware is one of the highest-impact, lowest-cost changes you can make in a kitchen.
- Peel-and-stick backsplash tiles require no special skills and can be removed or replaced without damaging walls.
- Lighting and paint choices influence how spacious and welcoming a kitchen feels more than most homeowners realize.
- Decluttering and thoughtful storage additions often deliver more visual impact than any new fixture or finish.
Why a Weekend Is All You Need
A full kitchen renovation can run tens of thousands of dollars and take weeks of disruption. But the kitchen's overall feel - the first impression it makes when you walk in - is often shaped by details that cost far less and take far less time to change. Hardware, lighting, color, and organization work together to define the space. Adjust a few of them strategically, and the room can look and function noticeably better.
The updates below are chosen specifically because they are achievable for everyday homeowners in a weekend, without requiring licensed trade work or a large budget. Many of them also support long-term home value by keeping the space well-maintained and visually updated. For a broader look at what happens when routine upkeep gets delayed, see our coverage of common maintenance tasks homeowners put off.
Replace Cabinet Hardware
Cabinet knobs and pulls are among the easiest swaps in any kitchen refresh. They require only a screwdriver, take minutes per cabinet, and the cumulative visual shift can be striking. Old brass or worn chrome hardware instantly dates a kitchen; clean matte black, brushed nickel, or warm bronze finishes read as more contemporary and cared-for.
Before purchasing, measure the existing hole spacing (the distance between the two screws on a pull) to ensure new hardware fits without filling old holes. If you want to change the spacing, small wood filler putty and a touch-up of paint can conceal old holes cleanly. Aim for consistency across all cabinets and drawers - mismatched hardware styles undermine the cohesive look you're working toward.
New hardware is one of the fastest and most affordable ways to modernize a kitchen's appearance.
Apply Peel-and-Stick Backsplash Tiles
Peel-and-stick backsplash panels have improved substantially in quality and realism. Many are now made from materials that convincingly mimic subway tile, stone, or mosaic patterns. They require no grout, no adhesive, and no special tools beyond a utility knife and a straightedge for trimming around outlets and corners.
Thorough surface prep is the key to longevity. The wall surface must be clean, dry, and grease-free before application - a degreaser wipe-down behind the stove area is especially important. Apply panels slowly and smooth out air bubbles as you go. While peel-and-stick is not a permanent solution in the way traditional tile is, it holds well on properly prepared drywall and can be removed without damaging the surface underneath.
Proper surface cleaning before application is what separates peel-and-stick tiles that last from ones that peel.
Repaint or Refresh Cabinet Fronts
Full cabinet replacement is expensive. Painting the existing cabinet boxes and doors is not. With the right preparation - cleaning with a degreaser, light sanding, and a bonding primer - cabinet-grade paint adheres durably and delivers a finish that can hold up for years under normal kitchen use.
Remove doors and paint them flat on sawhorses for the cleanest result with the fewest drips. Use a small foam roller for broad surfaces and a brush for edges and detail. Light colors (whites, soft greens, warm grays) tend to make smaller kitchens feel more open, while deeper tones can add drama in larger spaces. Allow full cure time - typically 24 to 48 hours - before rehinging. For more on the painting process itself, our room painting walkthrough covers surface prep in detail.
A bonding primer is non-negotiable when painting cabinets - skip it and the paint will chip within months.
Upgrade Under-Cabinet Lighting
Poor lighting is one of the most overlooked sources of kitchen dissatisfaction. Dark countertops make food prep harder and the space feel smaller. Plug-in LED strip lights or puck lights installed under wall cabinets are a relatively simple addition that requires no electrical work - they run on a cord tucked along the cabinet underside or connect via low-voltage adapters.
Warm white light (around 2700-3000K color temperature) tends to complement most kitchen color palettes and makes food look more appealing. Cooler light (4000K and above) works better for task-focused prep areas. Many strip lights come with adhesive backing and a simple remote or switch. Check that your outlet placement allows cords to be routed discreetly before committing to a layout.
Note: Any work involving hardwired electrical connections should be handled by a licensed electrician. Plug-in options avoid this requirement entirely.
Under-cabinet lighting transforms a dark work surface into a functional, inviting prep area with minimal installation effort.
Declutter and Reorganize Countertops
No finish or fixture improves a kitchen as much as clear, organized counter space. Countertops are the visual anchor of the room - when they're cluttered, everything else looks cluttered too. Start by removing every item and evaluating what genuinely earns its place on the counter based on daily use. Appliances used less than a few times a week are typically better stored.
Once counters are clear, add intentional organization: a mounted rail with hooks for frequently used utensils, a small tray to corral oils and frequently used spices, or a tiered stand to lift items off the surface. The goal is visual calm, not visual emptiness - a few purposeful objects look far better than a row of mismatched items. This same principle applies when setting up any shared household space, as explored in our guide to setting up a home learning space on a budget.
Clearing and intentionally curating countertops costs nothing and delivers an immediate improvement in how the kitchen feels.
Add a Fresh Coat of Paint to Walls or an Accent Area
Kitchen walls often show grease, steam, and scuffs more than any other room. A fresh coat of paint - especially in a washable eggshell or satin finish - restores cleanliness and can reframe the entire space. This doesn't require repainting everything: even painting one wall behind a dining nook or a short accent wall near the sink can shift the room's feel meaningfully.
Choose a finish that withstands humidity and cleaning. Flat paint absorbs grease and is difficult to wipe down - eggshell and satin sheens are the standard recommendation for kitchens. Make sure to patch any holes or dings before painting, and use painter's tape along edges where walls meet cabinets or trim. Proper prep prevents the uneven lines that make DIY paint jobs look amateurish.
A satin or eggshell finish on kitchen walls resists moisture and cleans far more easily than flat paint.
Make It Last Beyond the Weekend
The updates that stick are the ones built into a habit. Once you've refreshed the hardware, touched up paint, and reorganized storage, a simple weekly wipe-down of surfaces and cabinet fronts will preserve the look far longer than the initial effort took. Kitchens take more daily abuse than almost any other room, so consistent care - not periodic overhauls - is what keeps them feeling fresh.
Prioritize Tasks With the Most Visual Impact
If you find yourself inspired to go further, our guide to open shelving vs. upper cabinets walks through the real trade-offs of a more structural change. And before starting any painting project, this walkthrough on painting a room cleanly covers the prep steps most beginners skip. Small decisions made thoughtfully now can save you from costly corrections later - a principle explored in depth in our piece on home improvement myths that cost homeowners money.
The content provided on our blog site traverses numerous categories, offering readers valuable and practical information. Readers can use the editorial team’s research and data to gain more insights into their topics of interest. However, they are requested not to treat the articles as conclusive. The website team cannot be held responsible for differences in data or inaccuracies found across other platforms. Please also note that the site might also miss out on various schemes and offers available that the readers may find more beneficial than the ones we cover.